UNIX – Change DNS Records
This article will show how to get to the DNS Management area where you can change/add/remove DNS records for your domain as needed. This article assumes you are logged into your Customer Account Management area. If you are not please log in and then come back to this article. Client area Login and Password Change
BE AWARE!!! Extreme care should be taken when making changes to your DNS records as incorrect information can take your website, email or other web services offline. With DNS it always best to check at least twice before clicking apply.
For a brief rundown of DNS records, here is a link to an article from Google that very clearly explains what the different records are and what they are intended for. Basic Guide to DNS
If you have any questions or are unsure of exactly what to change or where, please call Succeed.net support at 866.888.4638 and one of our technicians will be happy to assist you.
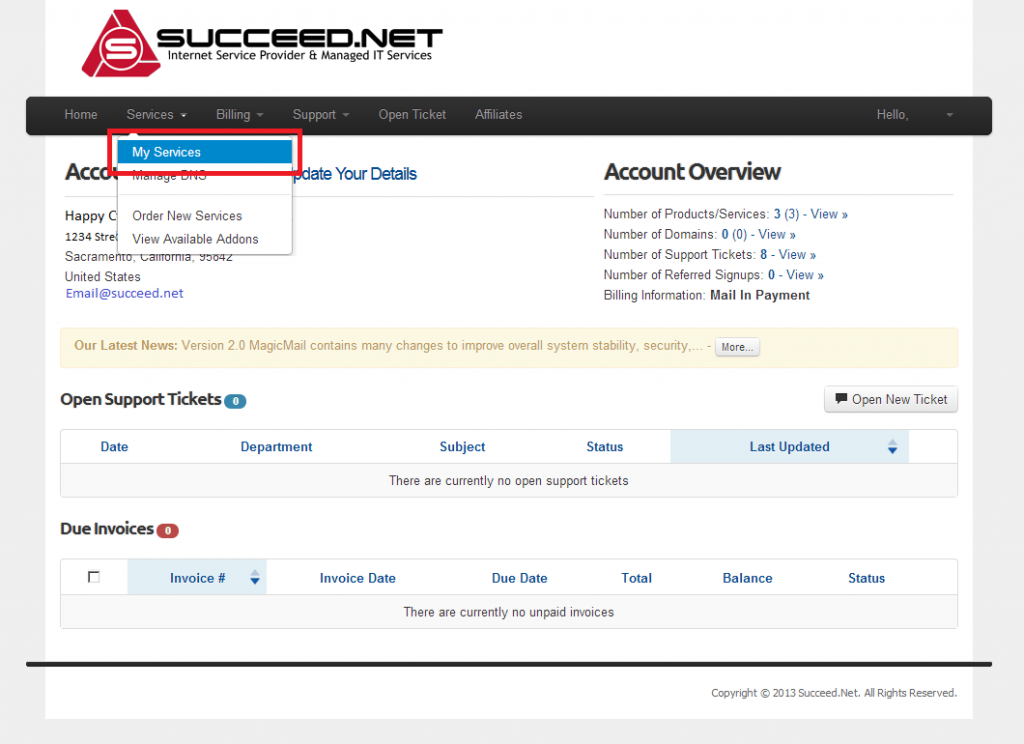
- Log into your Customer Account Area. In the menu across the top of the page click on Services -> My Services

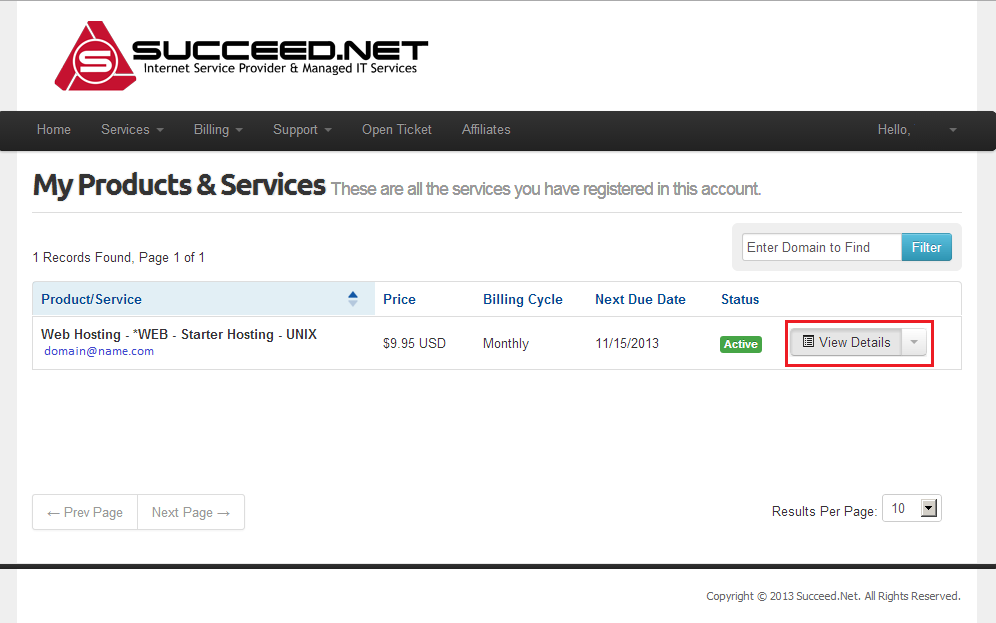
- You should now be on the My Products and Services page which gives you a list of the services on your account. To the right of the domain that you would like to log into click View Details

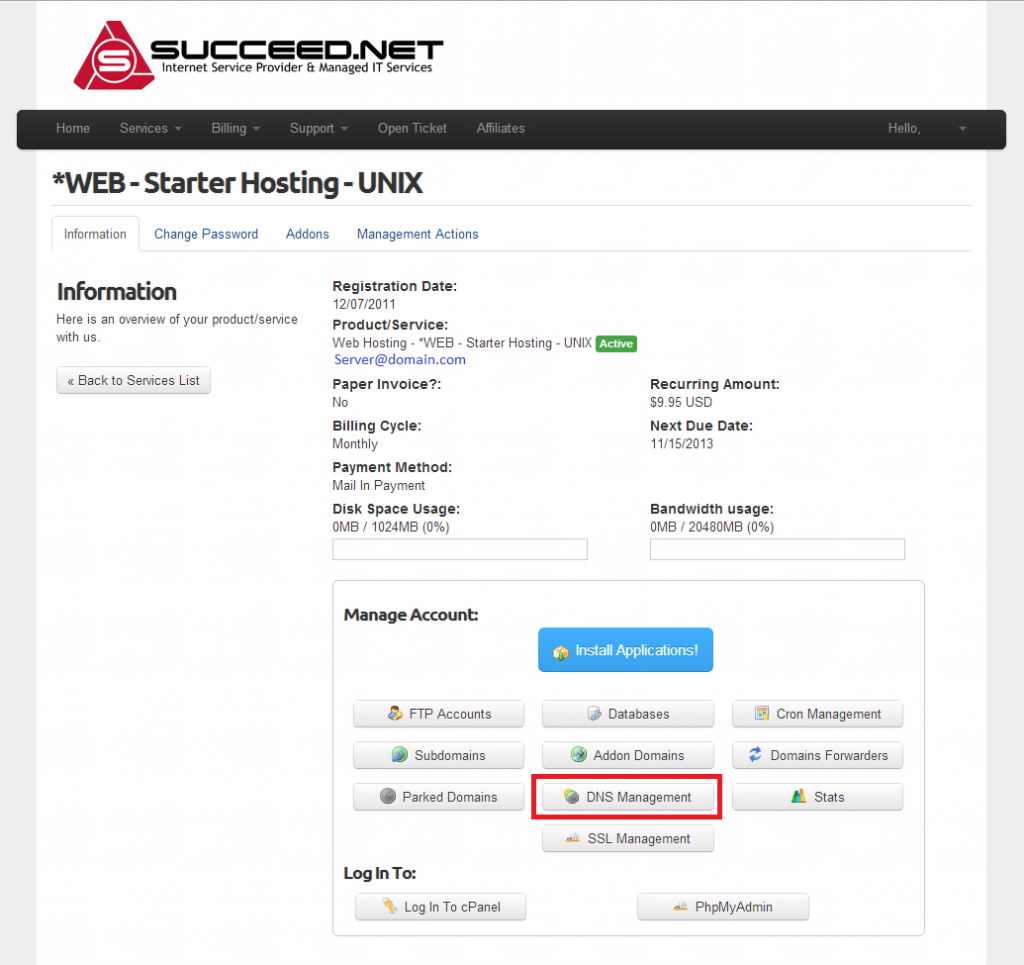
- To make changes to your DNS settings from the Product Detail page click DNS Management.

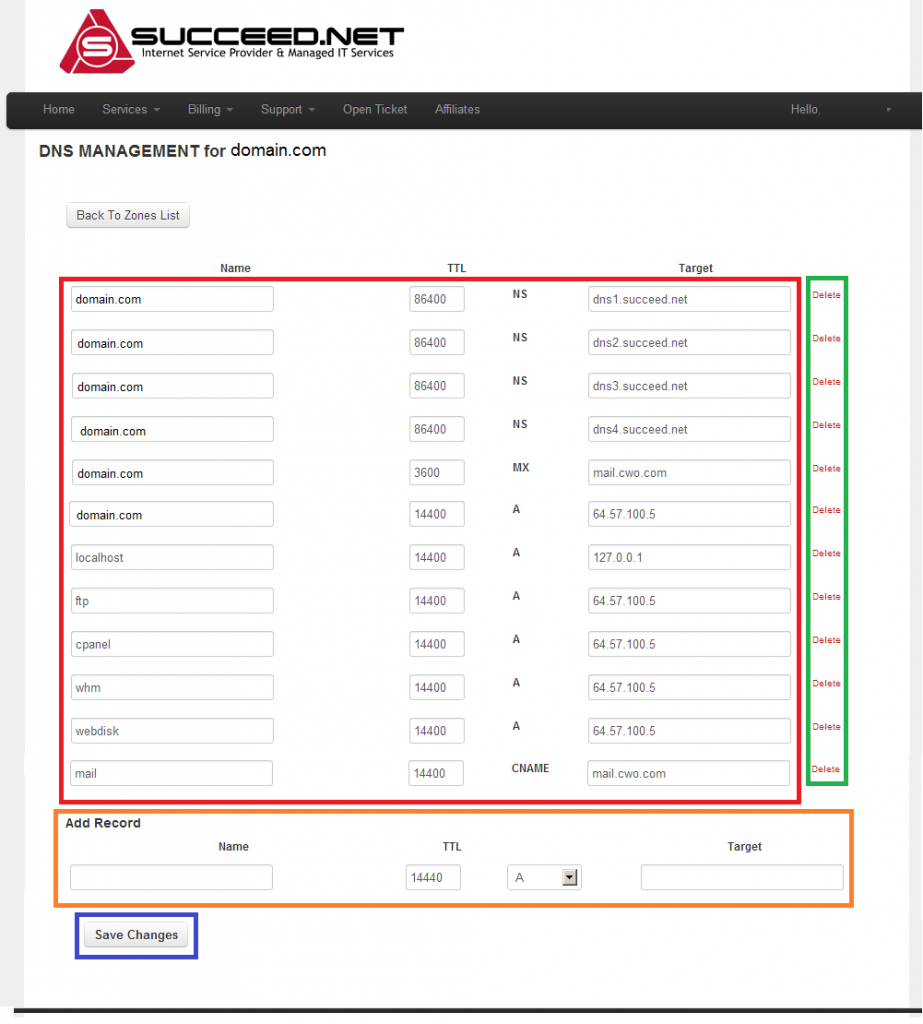
- To change an existing DNS record make your changes then click Save Changes button at the bottom of the page
- To remove a DNS entry click Delete to the far right of the record, then confirm that you would like to delete it and it will be removed
- To add a DNS record enter the subdomain, TTL (Time To Live), Record type (A, CNAME, MX…) and the target name or IP address then click Save Changes